
Building My Voron Switchwire 3D Printer
Documenting my journey from a box of parts to a fully working 3D printer.
What is the Voron Switchwire?
The Voron Switchwire is a 3D printer you build yourself, designed by the Voron community. It stands out for its clever motion system, smooth operation, and the ability to print fast and accurately. Unlike most 3D printers, it uses a unique "coreXZ" belt-driven system to move the print head, helping to create cleaner, more consistent and faster prints.
Learn more about the Voron Switchwire project and download files
Why I Built One
After using off-the-shelf 3D printers, I wanted to try building one from scratch. The Voron Switchwire appealed to me because of its active community, detailed instructions, and reputation for high-quality prints. Plus, building it myself meant I could understand every part of how it works and make it my own.
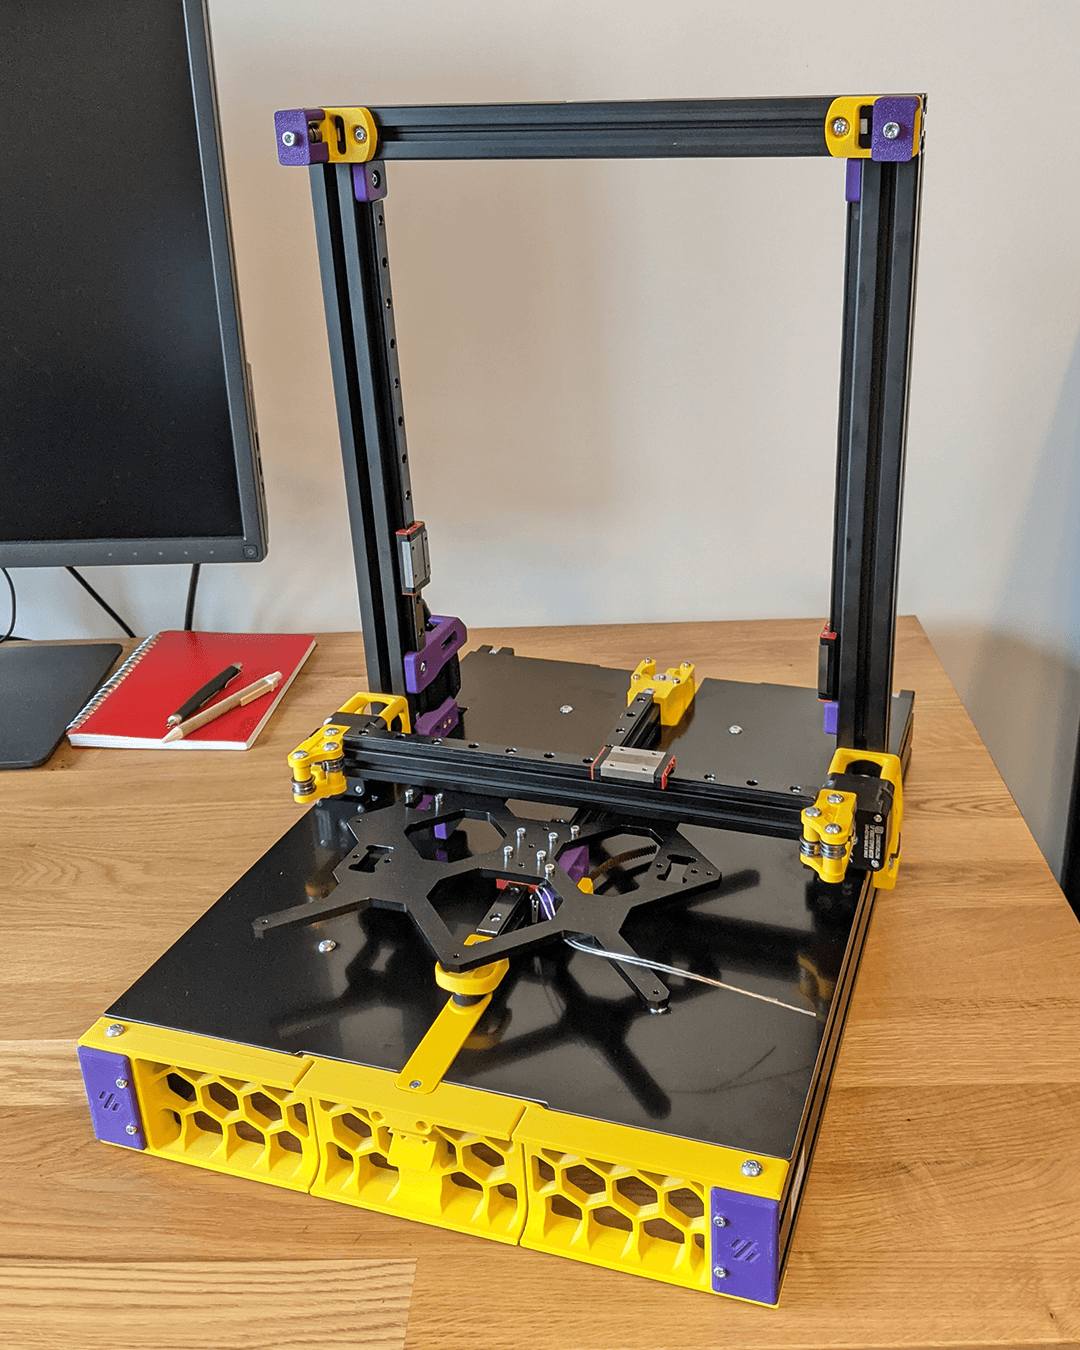
The Build at a Glance
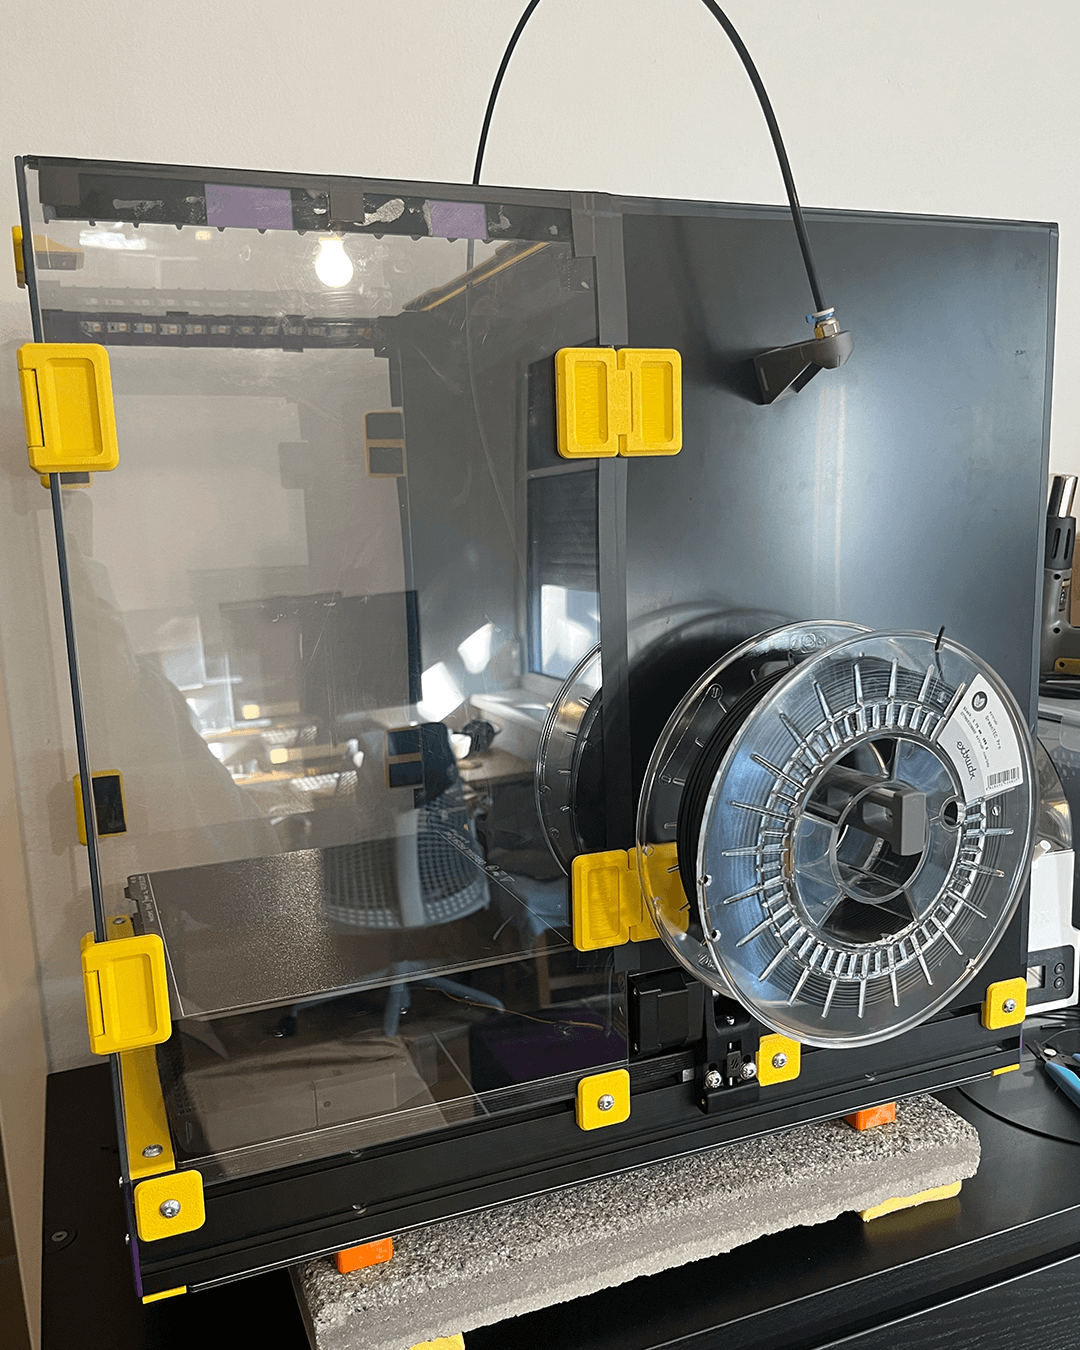
- Frame: Sturdy aluminum pieces bolted together
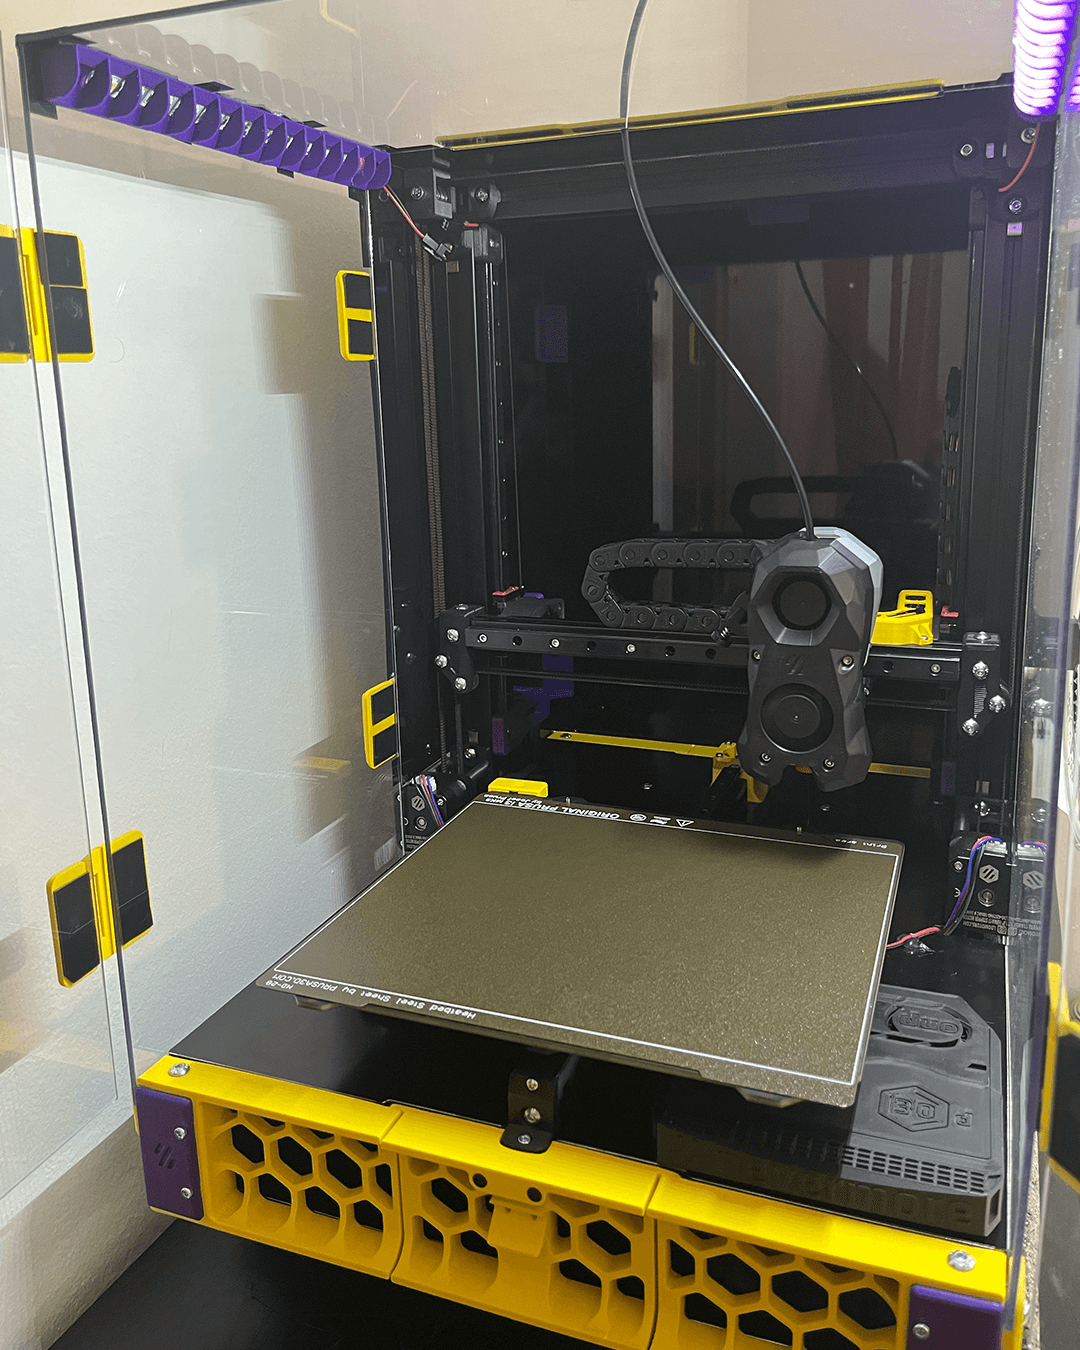
- Print Bed: Heated, with a magnetic top for easy print removal
- Print Area: Prusa MK4 bed - around 22 x 24cm
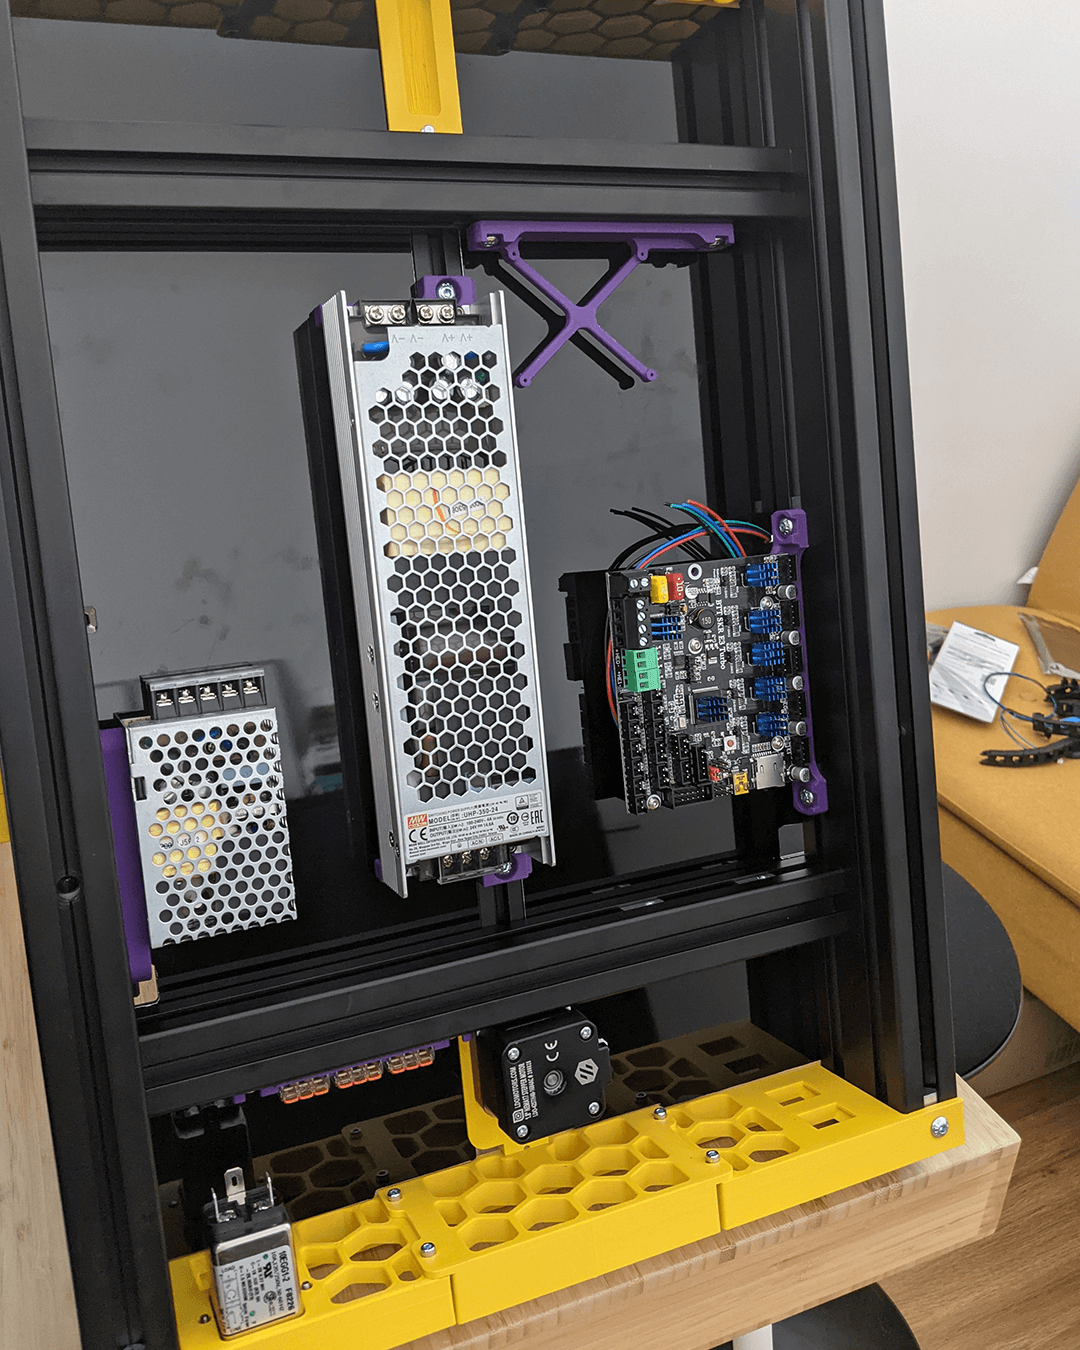
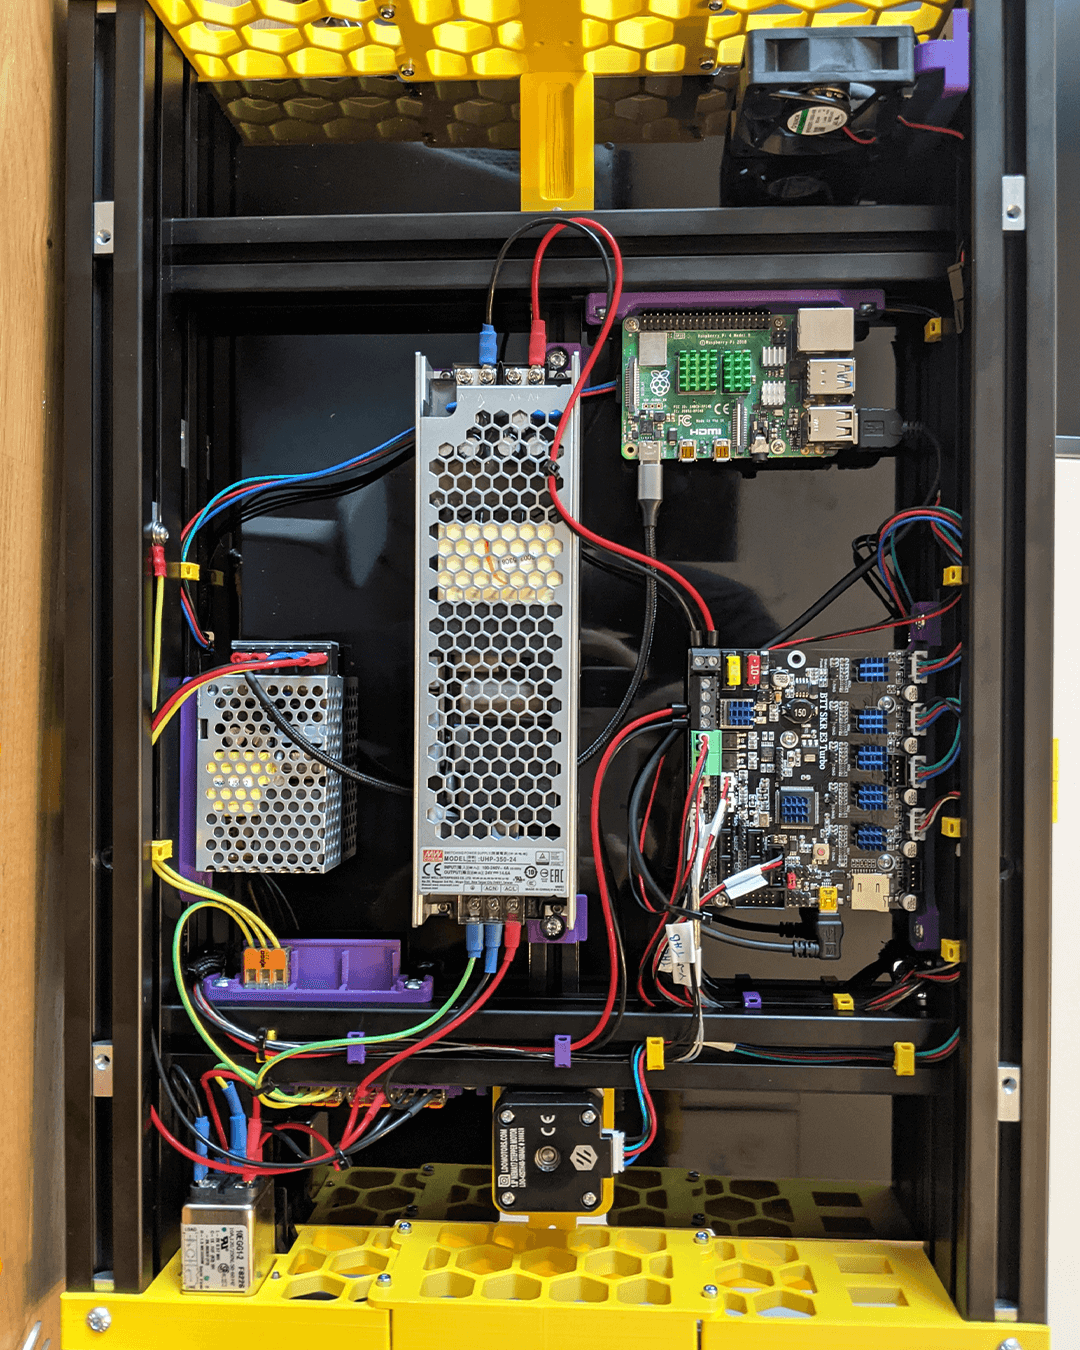
- Electronics: Raspberry Pi and a control board
- Software: Runs on Klipper, which is fast and easy to tune
- Slicer: Orca slicer (switched from SuperSlicer)
Step 1: Gathering the Parts
I sourced parts from various places: aluminum for the frame, electronics from online stores, and specialty items like rails and belts. I printed everything that's needed for the switchwire on my first 3D printer the Ender-3 - which I modified to be able to print ABS / ASA. It took a few weeks for everything to arrive, but opening each package felt like unwrapping a present.
Step 2: Building the Frame
The frame is the skeleton of the printer. I carefully measured and assembled the aluminum pieces, making sure everything was square and solid. This step is a bit like building with giant metal LEGO bricks.
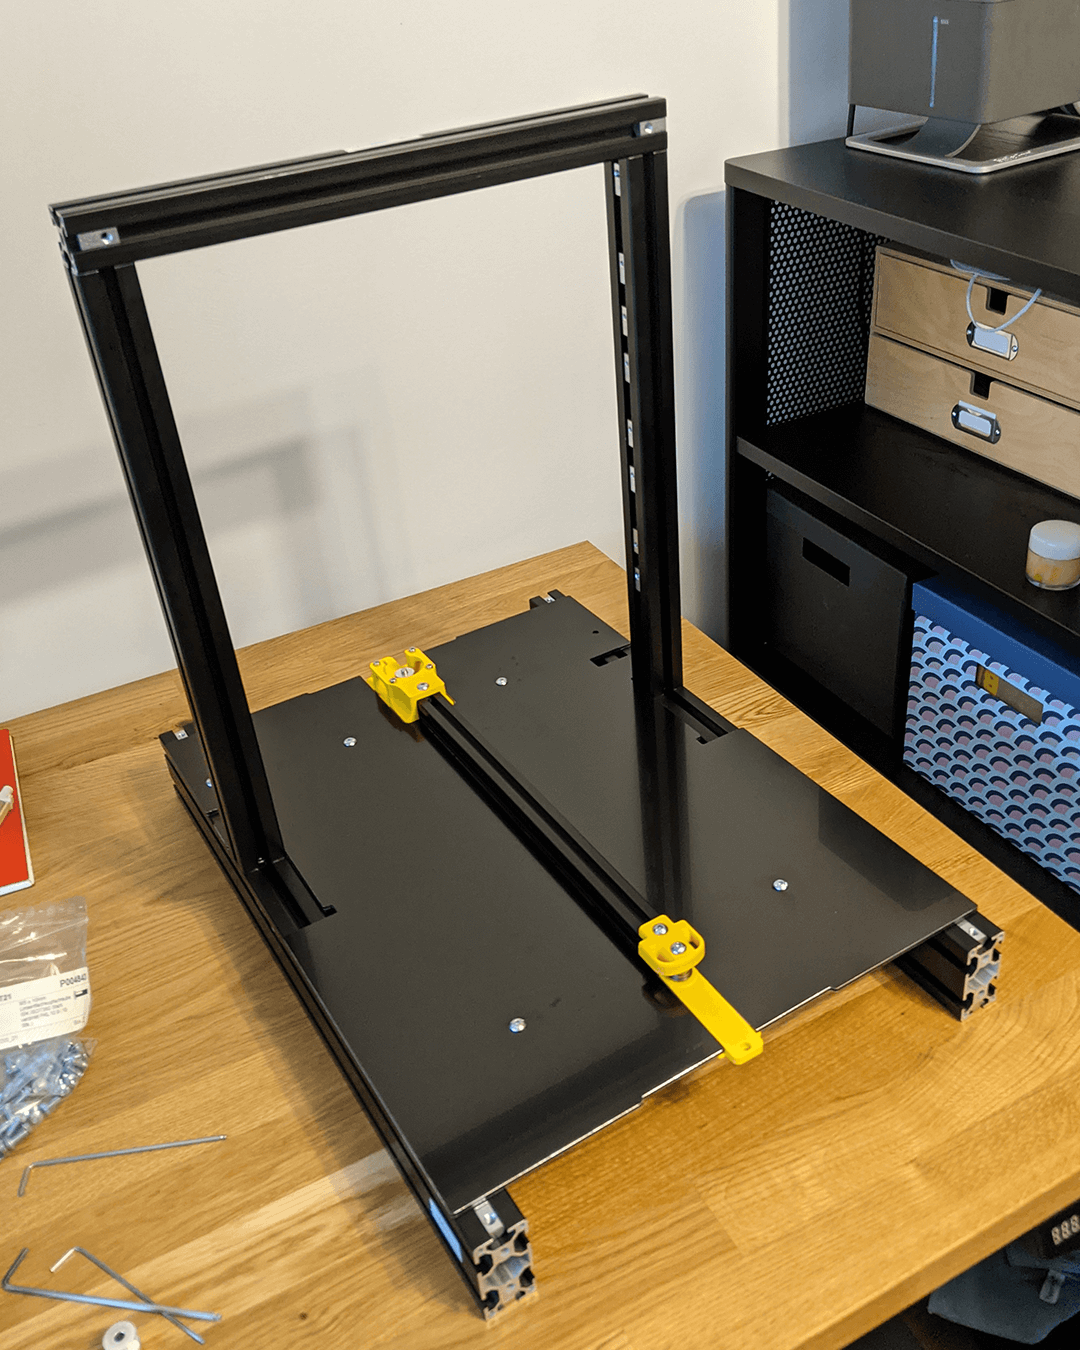
Step 3: Installing the Motion System
This is where the magic happens. The Voron Switchwire moves the print head and bed using smooth rails and strong belts. Setting this up took patience and a steady hand, but it was satisfying to see everything glide effortlessly when finished.
Step 4: Wiring It Up
The electronics were the trickiest part for me. I installed the power supply, control board, and Raspberry Pi, then connected all the wires. I double-checked everything before turning it on for the first time — always a nerve-wracking moment!
Step 5: The First Test
With the software installed and everything checked, I powered on the printer. The screen lit up, the motors hummed, and after a few tweaks, it was ready for its first print. Watching it lay down perfect lines of plastic was incredibly rewarding.
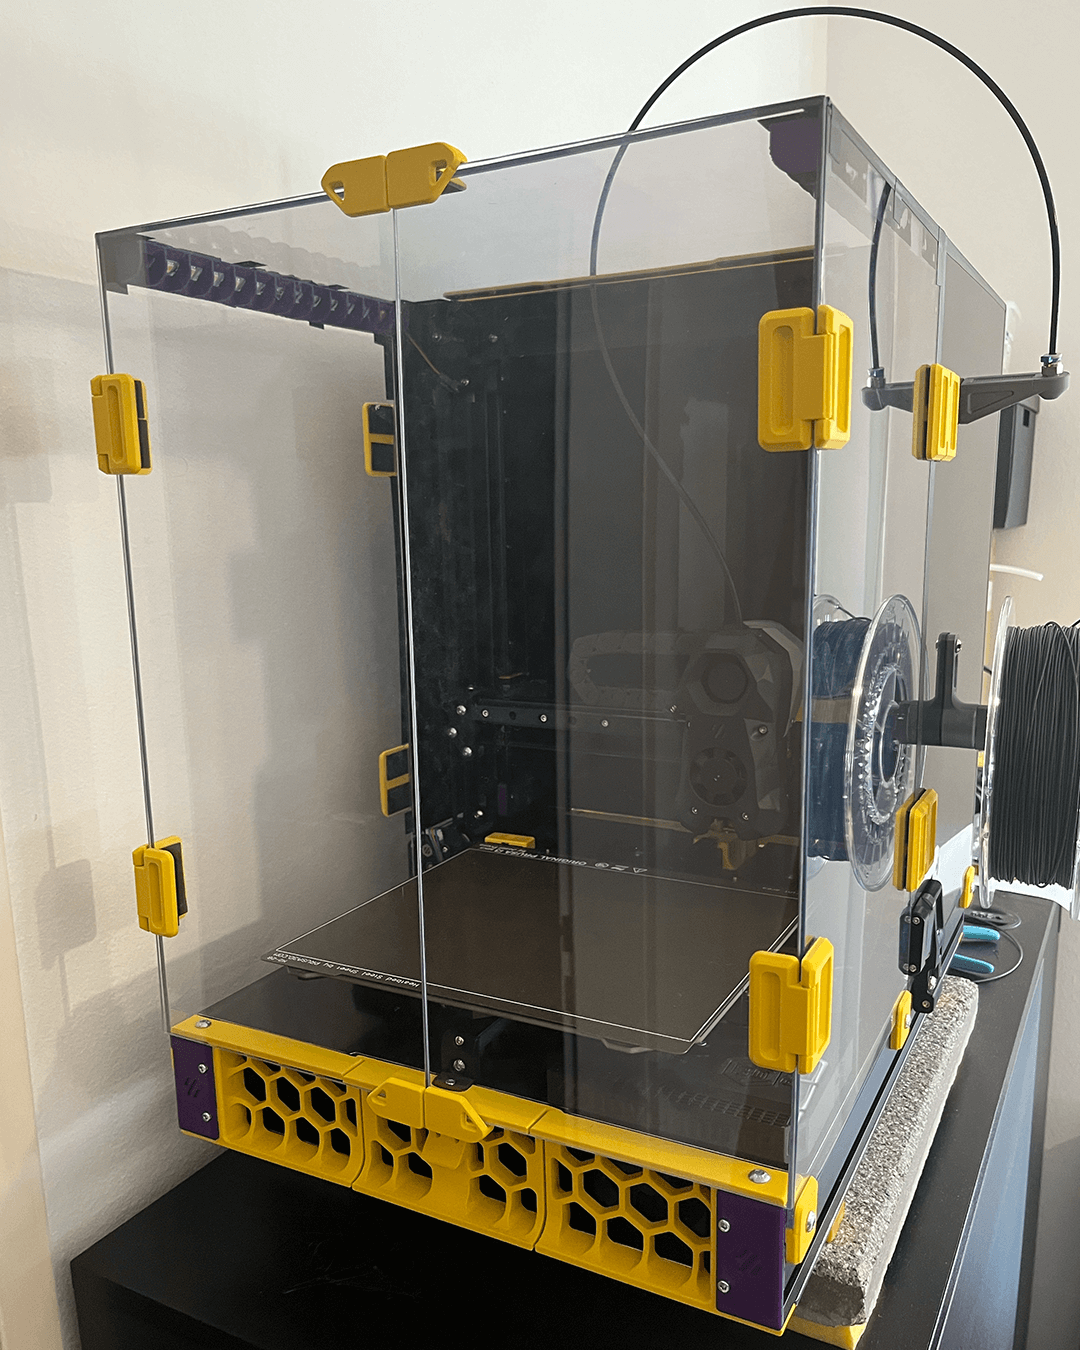
Toolhead Upgrades: Stealthburner & E3D Revo
During my build, I made a few changes to the printer’s toolhead. After some research and tinkering, I upgraded to the Voron Stealthburner toolhead paired with the E3D Revo hotend.
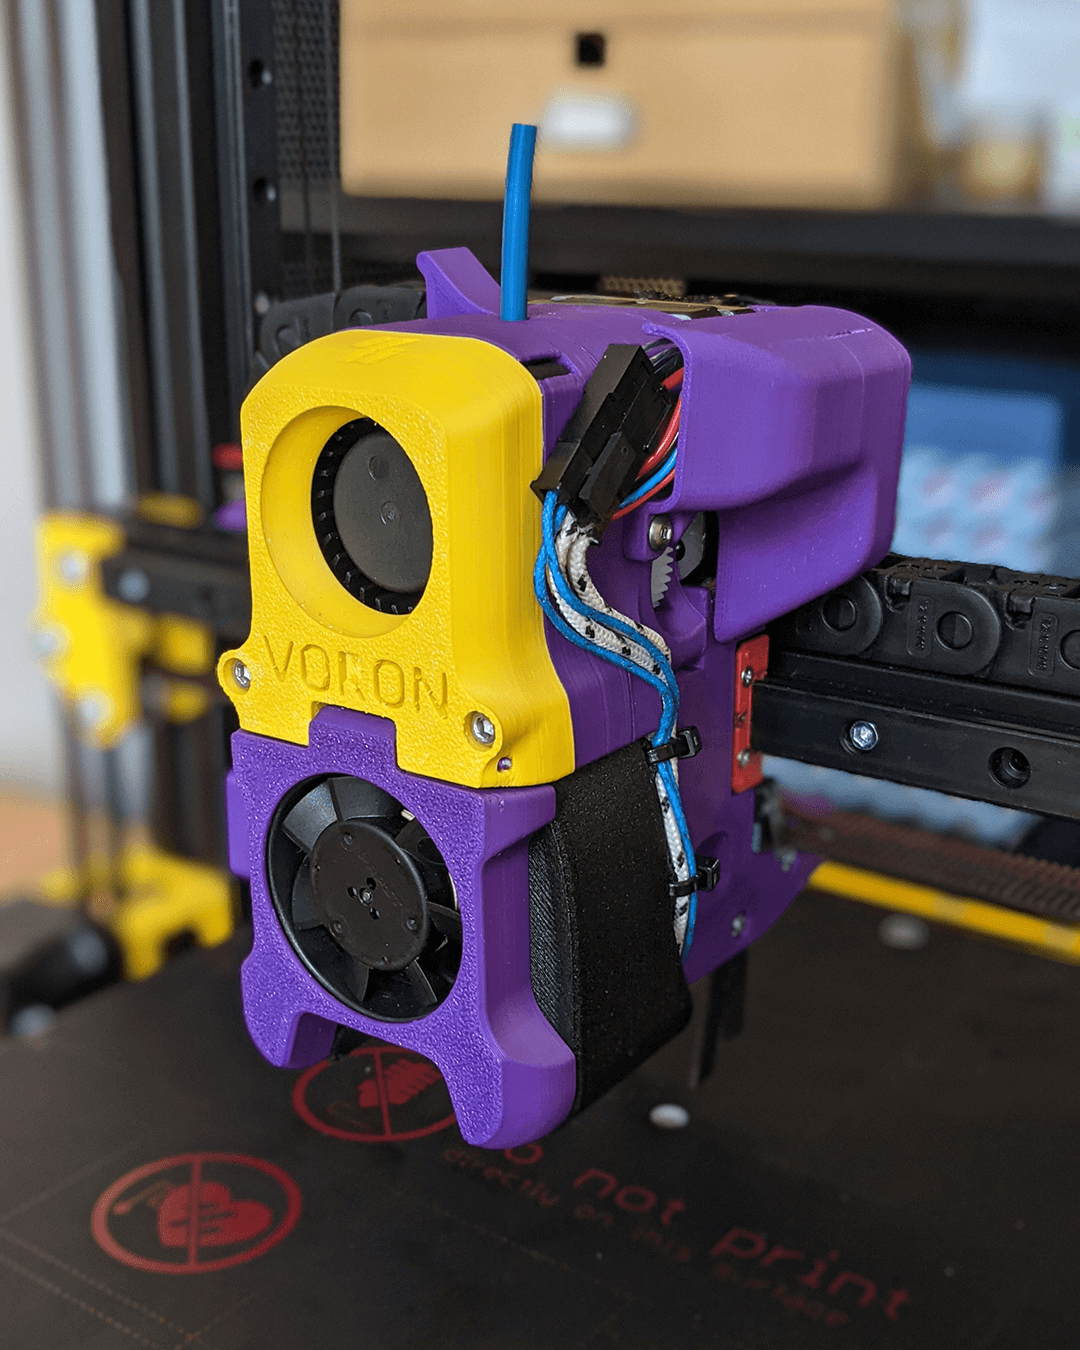
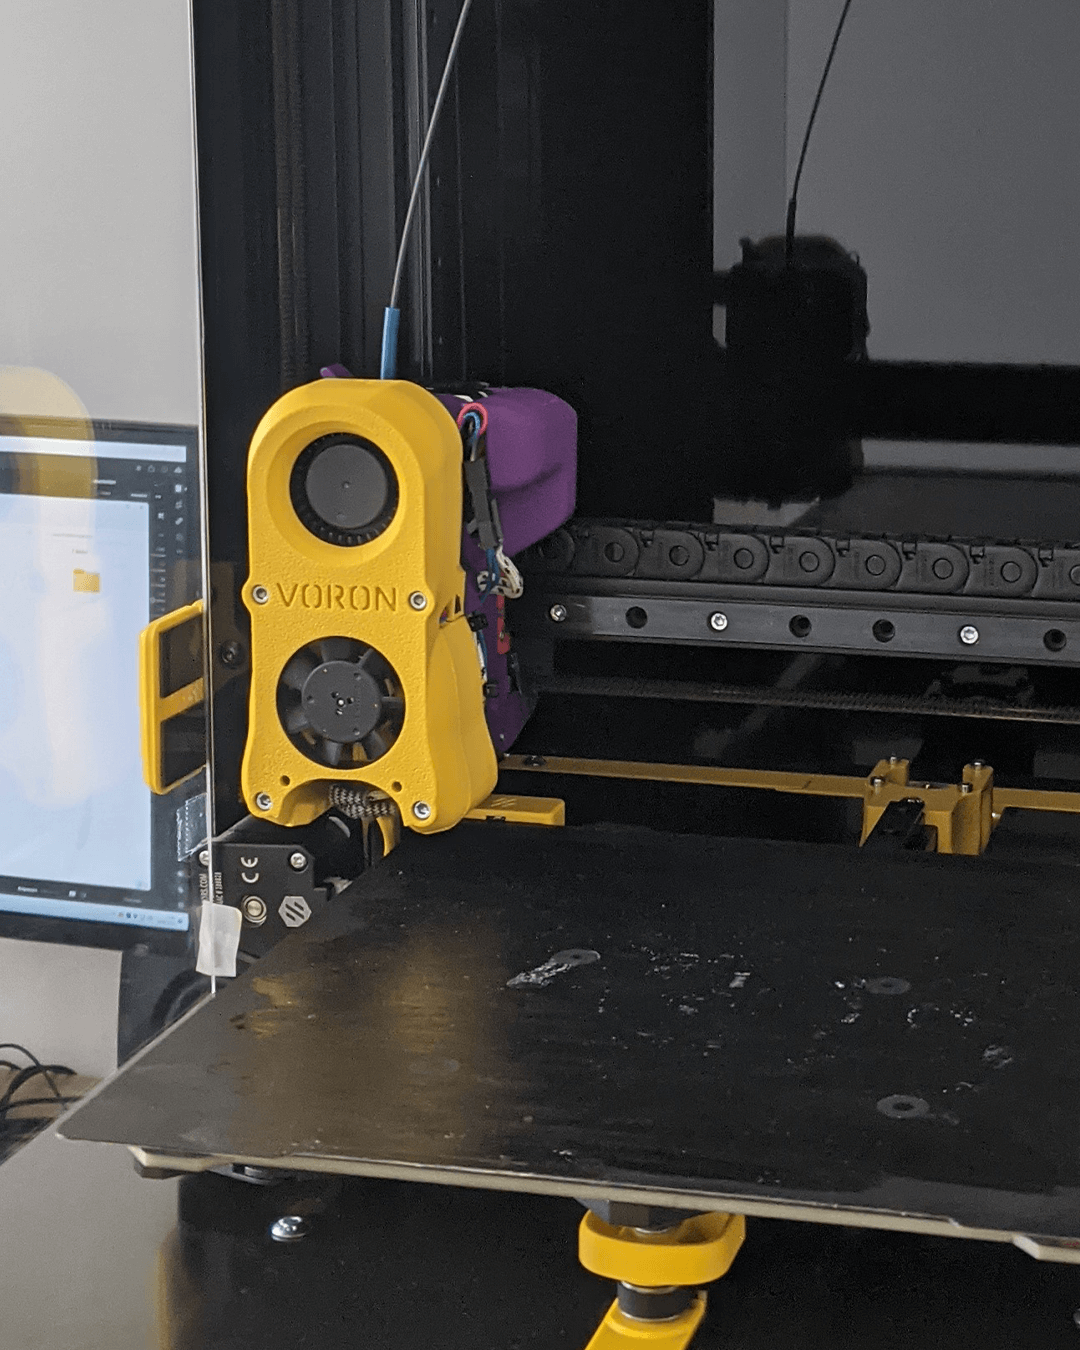
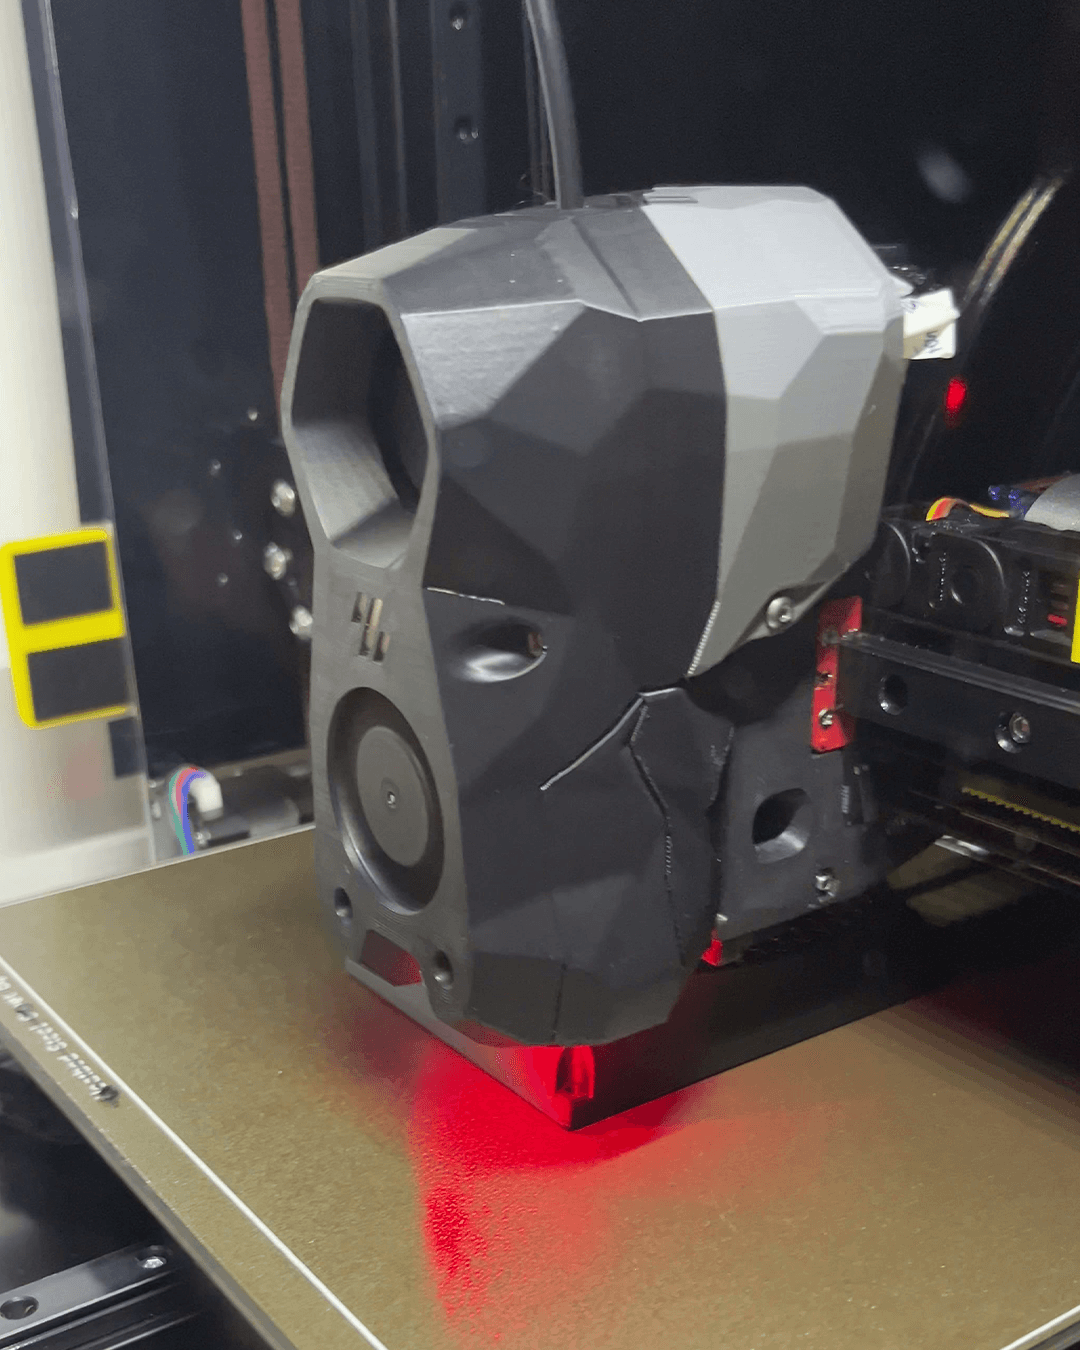
The Stealthburner – the last iteration for now, the one in black – is Voron’s latest toolhead design. It offers improved cooling, modular parts, and even customizable RGB lighting. The E3D Revo hotend makes nozzle changes quick and tool-free — just unscrew and swap at room temperature. This setup has made maintenance easier and lets me experiment with different nozzle sizes without hassle.
My Custom Modifications
To make my Switchwire even more reliable and user-friendly, I made a few extra modifications beyond the official build:
- Nevermore Filter: I added a Nevermore air filter inside the enclosure to help reduce dust and odors during printing, keeping the air cleaner and the prints better.
- Klicky Switchwire Probe: For easier and more accurate bed leveling, I installed a Klicky probe. This makes setup and calibration much simpler and more precise.
- Stronger Gantry & Y-Axis Parts: I reinforced the gantry and Y-axis components with sturdier printed parts and upgraded motor blocks. This improves overall stability and helps maintain print quality over time, even during long or fast prints.
These tweaks have made the printer easier to use and more dependable for daily printing.
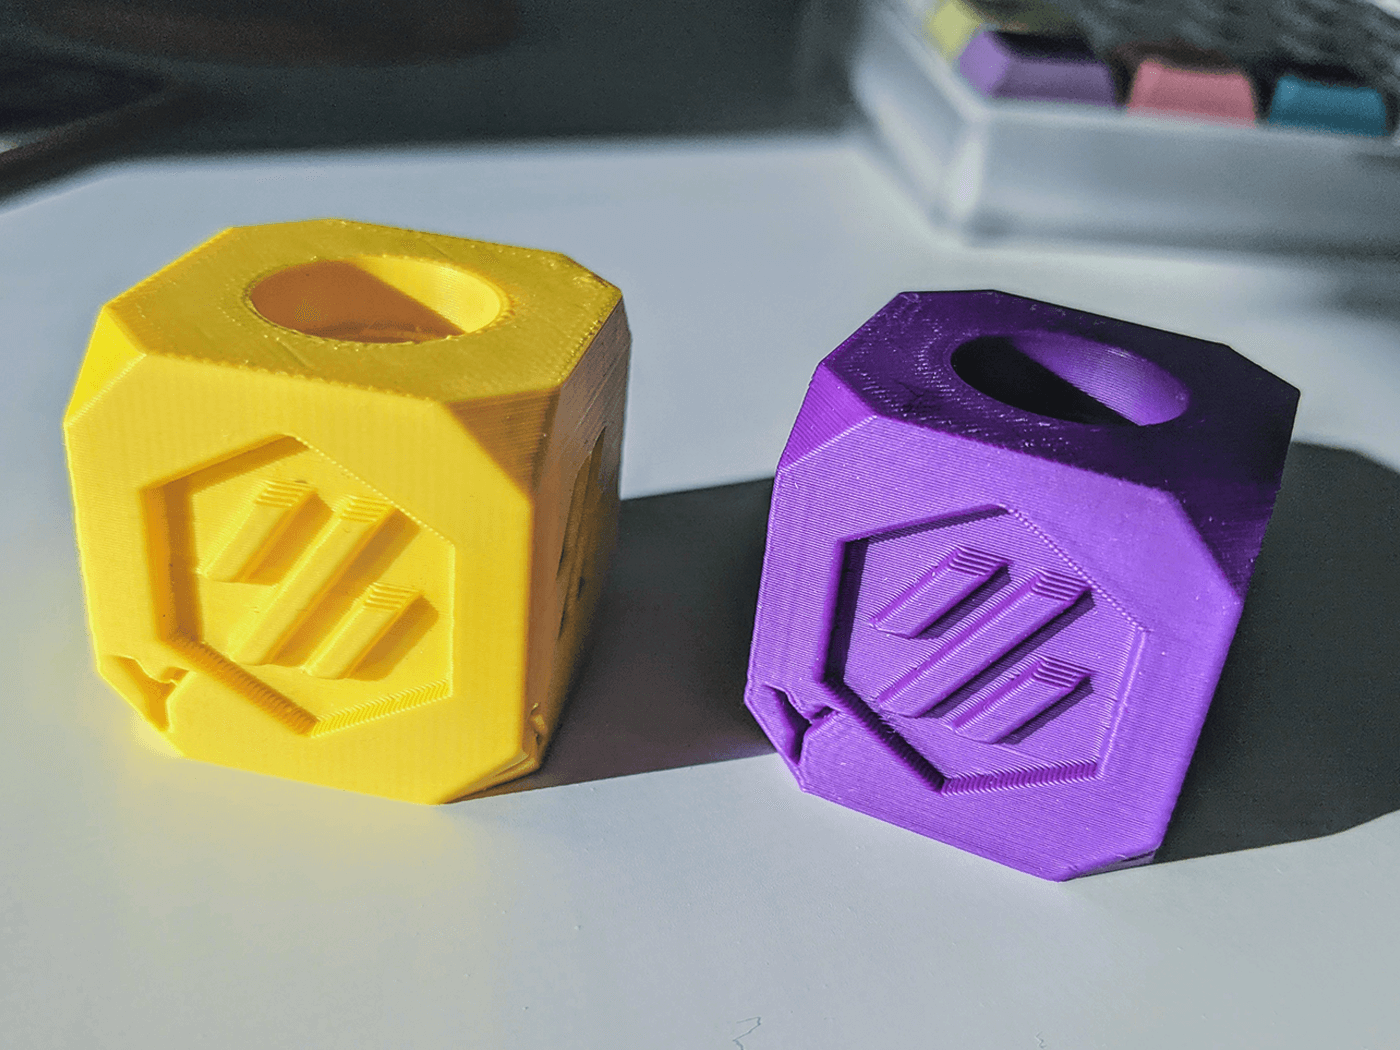
Results & First Prints
The first prints came out beautifully — smooth layers, sharp corners, and no weird lines or wobbles. The printer is also quiet and fast, which makes it great for everyday use.
What I Learned
- Building a printer from scratch is challenging but fun
- The Voron community is super helpful
- Taking your time and double-checking steps pays off
My Tips for Other Builders
- Read the manual twice, build once
- Don’t rush — enjoy the process!
- Join the Voron Discord for advice and encouragement
Resources
- Voron Switchwire Official Project Page
- (Add your own build photos and configuration files links here)
Final Thoughts
Building the Voron Switchwire was a rewarding and educational project. I learned a lot about 3D printer mechanics, electronics, and tuning, and I enjoyed customizing the machine to fit my needs. The process gave me a deep understanding of how everything works and the satisfaction of creating something from scratch.
However, as of 2025, I would not recommend building a Switchwire (or any DIY printer) unless you are genuinely interested in the building and tinkering aspect of the hobby. The process can be time-consuming, sometimes frustrating, and requires ongoing maintenance and troubleshooting. If your main goal is simply to print reliably, with great quality and minimal hassle, I would strongly suggest buying a Bambu Lab printer instead. These machines are now even cheaper than sourcing and building a Voron yourself, and they deliver better print quality and usability right out of the box.
If you love the challenge and want to learn, build, and modify, the Voron community is fantastic and the project is still a great experience.
Questions? Feel free to reach out!